The Old Slideshow With Music And Titles Has Been Reborn In
The Computer—It’s Easier And Faster To Create With
More Possibilities
Text And Photography By Chuck Summers
For
me, one of the greatest joys of photography is sharing my work
with others, and a favorite way of doing this has long been
through multimedia slideshows. For years, I’ve used
multiple projectors and a dissolve unit to set my slideshows
to music. Putting the show together and then syncing it to the
music took a great deal of time and effort.
That task has now become much easier with the advent of computer
software designed to produce slideshows. Using scanned images
and files from my digital camera, I now can produce stunning
slideshows in a fraction of the time previously required using
my conventional equipment. Plus, I can add new transitions not
possible with the old way, and slides and music never again
go out of sync.
The old vision of
slideshow production was one of slides all over, trays with
upside-down and backward images, cables connecting multiple
show devices (projectors and tape decks), and music that was
a challenge to match with image changes. With current digital
slideshow programs (available for both Windows and Mac users),
the whole process is a lot easier. I made my first all-digital
show with music and titles in an afternoon after first receiving
the software.
Most programs allow you to click
and drag desired images into a “slideshow list.”
With the program I’m using (Photodex ProShow Gold), I can
view five frames at a time. The software also allows you to
set the transition time between images. Here, you have far more
time options than are found on any dissolve unit. You can have
very quick changes among a group of images to fit an interesting
passage of music, then change to a slower pace in another section.
An added benefit is the choice of
a vast number of transition effects: fades, distortions, wipes,
shapes, pushes, etc. ProShow Gold, for example, has more
than 170 different transition effects! I’ll likely never
use many of these special effects transitions, but it’s
wonderful having so many different options from which to choose.
Since I’m a newcomer to the world of digital photography,
my biggest challenge was scanning slides I wanted for the show
(digital camera images are much simpler to work with, obviously).
As I worked on the show, a preview option allowed me to see
how the images would look in transition with one another. As
I moved through production of the program, I could see how images
flowed and easily switch the order of photos whenever I felt
a change was desirable. Changes are just drag-and-drop to new
locations.
After creating a good visual flow
with my photos, I then had to find an appropriate piece of music
to use with the show. This requires making a digital
file of the song. If you’re doing this strictly for friends
and family, you can record a song from a CD placed in your CD
drive. If you’re doing any shows “for hire” (where
people pay money for it), you must use royalty-free music (there’s
a lot available on the Internet; just type “royalty-free
music” in Google or another search engine).
In the past, the most difficult part
of putting a slideshow together was making my slides and music
begin and end at the proper time. This process could
literally take hours. That’s no longer the case. You actually
can sync the music with one click! There may well be times when
you’ll want to sync the music manually for dramatic effect,
but the automatic sync feature is an incredible tool.
Yet another wonderful benefit of the computer-generated slideshow
is the ability to add captions or titles to your images. In
the past, I used reversal film to make title slides for my shows,
a complicated and expensive process. Now, I can easily insert
text anywhere I choose. A myriad of fonts and text sizes may
be used. This option opens the door for doing a greater variety
of slideshows.
There are new options for playing
these shows back, too. My program allows me to make an autorun
CD that will automatically play when inserted into a computer.
I also can create an MPEG video file that can be viewed on any
computer with video playback software, or create a VCD or DVD
that can be played back on a TV using a compatible DVD player.
A more common “slideshow device” is now the laptop.
People travel with laptops all the time, and it’s not uncommon
for someone to transition from business traveler to proud parent
showing off a little slideshow of the kids. These options, along
with the ability to e-mail or post the slideshow online, allow
you to share your show with an infinite number of people without
having to set up a projector, sound system and screen.
However, a slideshow can be projected in the more traditional
way, using an LCD projector with a computer or laptop (again,
a lot simpler than the old way). I was amazed at how good the
first slideshow I produced looked on screen, especially since
I had chosen a rather low 640 x 480 resolution and the projector
I was using allowed for twice that resolution.
One drawback with computer-generated slide-shows is that the
transition between horizontal and vertical images can be more
distracting. Whereas the horizontal images will fill the frame
of a computer or television set, a vertical image will not.
In the past, I’ve used a combination of vertical and horizontal
slides in my programs. In the future, I’ll look to do more
programs limited to one or the other format.
As with any good slide program, it’s
still important to look for images that work well in transition
with one another. Here, colors, shapes, mood or themes
might dictate what image will look best next to another. Choosing
music that works well with your images also remains a critical
element in slideshow production. I typically work as hard on
finding music that “fits” as I do on finding the right
images for the show.
With the versatility and ease of
use of the new slideshow software, I’ll no doubt be doing
more slideshows than ever before. I’ve already put
together a program featuring nature scenes and scripture to
be used at the church I serve. I’ve also produced a program
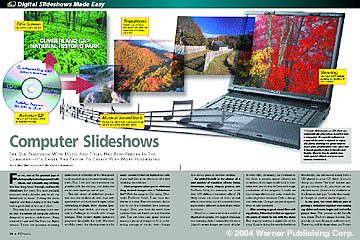
featuring the natural beauty of the Cumberland Gap National
Historical Park and presented it to the park superintendent
for use in promoting the park. The types of shows one can produce
using these programs is limited only by one’s imagination.
The joy and satisfaction I’ve
found over the years sharing slideshows with individuals and
groups will only be magnified by the move to digital slideshows.
I’ve already given numerous autorun CDs of my programs
to family and friends. I also can foresee using these CDs to
introduce my work to editors and clients. And when you consider
that most computer slideshow programs run well under $100, I
really can’t see why anyone wouldn’t give these programs
a try.
Tips For Producing Digital Slideshows
1.
Present your best material. Begin with sharp, properly exposed
images. Edit your work carefully. Whether the show is viewed
on a monitor or television, or projected, you want your images
to look the best they possibly can. 2.
Consider using horizontals only. Horizontal images will fill
the computer monitor or television set, whereas verticals
come out significantly smaller.
3. Select
images that work well together. Have a reason for putting
one slide next to another. Look for images that will create
interesting transitions.
4. Avoid abrupt changes
from very dark to very light images. Find an image that’s
more medium in tone when making transitions from dark and
light images.
5. Preview your work as
you go. The software allows you to stop at any point in the
production of a slideshow and watch the transitions. You don’t
have to wait until you finish putting the slides together
to know what works and what doesn’t.
6. Choose your music
carefully. Pay attention to tempo and style. Does the music
help convey the mood or feeling you’re trying to present?
Having the “right” music makes all the difference
in the world.
7. Don’t make your
show too long. It would be better to have five four-minute
programs than one 20-minute program. Don’t overestimate
your audience’s attention span.
8. Use
title slides effectively. Since generating title slides is
quite easy with the present software, beware of overdoing
text and text effects. Make good use of title slides and text
when this really helps your program.