|
Now, it’s true that a $1,000 projector today does have
its limitations. Some photo purists would have you believe
that these just won’t do—you have to buy something
with more capability. Personally, I’d love to be able
to buy a high-end projector, but I can’t. So
I’ve tried the lower-priced models, and guess what—they
work! There’s just something spectacular about
projecting your digital images in a darkened room to sizes
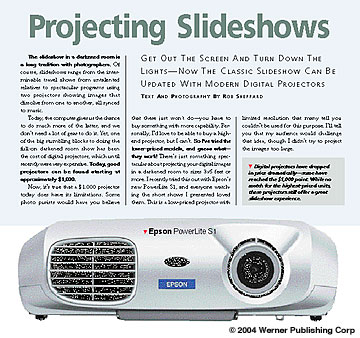
3x5 feet or more. I recently tried this out with Epson’s
new PowerLite S1, and everyone watching the short shows I
presented loved them. This is a low-priced projector with
limited resolution that many tell you couldn’t be used
for this purpose. I’ll tell you that my audience would
challenge that idea, though I didn’t try to project the
images too large.
Yes, there are shortcomings: resolution is limited, the spaces
between the pixels show, contrast can be an issue, and colors
are often different than what you see on the computer screen.
However, only photographers go right up to the screen and
complain about resolution and pixels—the average person
is more impressed with the photos (as we all should be). If
the projected size is kept reasonable, the images look very
good, plus the other issues can be addressed.
Another problem is that projectors are optimized for PowerPoint
and not photography. I’ve actually projected with many
projectors, low- to high-priced, all around the country as
I’ve given classes and workshops, and the same images
have ranged from great to garish. There are some adjustments
that can be made to maximize any projector, though.
Projector Tendencies
First, let’s look at what we, as photographers, can expect
from today’s projectors. It’s important to realize
that PCPhoto hasn’t tested every projector on the market.
However, we’ve dealt with multiple brands in varied situations
and found there are some consistent trends. We’ll also
offer practical tips to help you deal with these issues and
better use a digital projector, whether it’s yours, one
you borrowed from work or something used by a camera club.
It’s important to test your
projector in your conditions to see if all of the following
things apply.
• Projectors as a whole tend
to warm up images. Evidently, engineers figure PowerPoint
presentations could use a little warming up, and that transfers
to photos as well. This isn’t always a problem with photographs—photos
often look good with some extra warmth. The problem comes
if the image is warm to begin with or has colors that are
adversely affected by added warm tones.
• Colors have a tendency to
be strongly saturated. The solid colors of a PowerPoint
presentation often look better this way. However, on a brightly
colored photo, this can be too much, making the photo look
garish. I once did a presentation in front of a group of professional
photographers and was horrified to see garish flowers projected
on a screen that had no relation to the image on my laptop.
I wanted to pass the laptop around to prove the photo looked
good.
• Contrast is often high.
Lower-priced projectors, in particular, don’t have a
long tonal range from black to white, and will increase the
contrast of a photo.
• Reds can be a problem.
Because of the warming and saturating tendencies of the projectors,
reds quickly can look bad.
• Text can be an issue.
With lower-resolution projectors, text can be hard to read
if it’s too small and fine.
Working With A Projector
It’s a good idea to preview
a slideshow by yourself before showing it to anyone.
In the days of slide projectors, you’d do that to be
sure no images were upside-down or backwards. Today, you need
to do it to be sure images look okay on screen and that they
work well together. Once projected, mistakes just look worse.
Okay, so much for the challenges. Before offering specific
solutions to get the most from a projector I need to mention
something that isn’t a projector issue, but is a digital
slideshow challenge—image size. If you leave your photos
at their original resolutions (projectors don’t need
megapixels), you’ll slow down fast slide changes and
make transitions run poorly.
Resize your photos to slightly
above the projector resolution (I recommend that because
you may want to use a higher resolution in the future). Most
image-processing programs allow you to resize photos. ACDSee
has a very easy-to-use batch-resizing interface that lets
you change the size of your photos and resave them in a new
file. A good choice is to size images to approximately 1200
pixels wide by 900 high (this will vary, depending on the
format of the original). Be sure to tell the program to resize
within these parameters and not exactly to the sizes (the
latter can stretch and pull an image).
Since projectors mostly tend to
warm up and saturate images, typically you may want to decrease
both factors. I don’t recommend batch-processing
everything since you may find you like the look of an image
projected as is. I find a good way of doing this is to use
adjustment layers. Start with an adjustment with a Hue/Saturation
layer on one photo and see how it looks. You might try a Color
Balance layer, too, to remove some warmth. If they work, then
you can use that photo as the “source” of all adjustment
layers.
Next, open up each photo (since they’re smaller in size
now, you can open up many of them at once), then go to the
source photo and drag its adjustment layers to the new photo.
Adjustment layers aren’t size- or shape-specific, so
if your photos vary a little, you’ll have no problem
doing this. You simply click and hold on the adjustment layer,
then drag the layer all the way onto the new image (you must
get that cursor all the way onto the other photo or the layer
won’t transfer).
Now, look at the photo. If it needs further adjustment, you
have the advantage of reopening an adjustment layer. Just
double-click the adjustment icon on the layer and you’ll
have the original adjustment settings that can be changed
as needed.
Fixing contrast problems can be troublesome. Try using the
bottom, output sliders in a Levels layer to reduce the white
and black (move the sliders in from the ends). Brightness/Contrast
sometimes works.
Reds can be fixed with the Hue/Saturation adjustment layer.
Since not every image is going to have red problems, you should
do this photo by photo. When needed, click on the Master colors
of the control (this is true for most image-processing programs)
to get a list of individual colors. Choose red, then reduce
the saturation, which will limit this change to red.
The obvious way to deal with text
is to use larger fonts. Slideshows of pretty pictures
shouldn’t have small text anyway—look for something
bold and easy to read.
I think we’ve entered a new era of photography. The potential
for slideshows is great, and projectors enhance that experience.
At this stage in the process, you do need to do some tweaking.
|