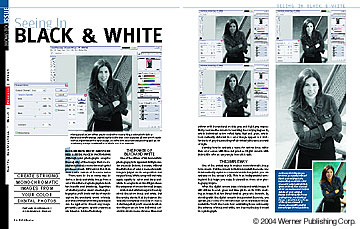
Create Striking Monochromatic Images From Your Color Digital
Photos
Text And Photography By Ibarionex R. Perello
Black-and-white
images always have held a special place in photography. Although
color photographs comprise the majority of the images that are
created and printed, a monochromatic print produces a much different
reaction than does a color version of the same scene.
There seem to be as many ways to derive a black-and-white image
from a color file as there are photographers. Each has benefits
and drawbacks. Regardless of whether you’re a casual or
serious photographer, you’ll find a variety of ways to
explore the wonderful world of black-and-white. While the following
techniques can be applied in almost any image-processing program,
specific references are based on Adobe Photoshop.
The
Power Of Black-And White
One of the virtues of black-and-white photography is its apparent
ability to render a scene to its basic elements. Without the
distraction of color, a monochromatic image is judged on its
composition and range of tones. While compositional rules apply
equally to color and black-and-white, the emphasis on tonality
produces the uniqueness of a monochromatic image.
A black-and-white image isn’t merely about the colors black
and white, but the varying shades that lay between the darkest
and brightest elements of a scene. A challenge that you’ll
encounter when shooting a scene is how individual colors translate
to monochrome. Blues and yellows will be rendered as dark gray
and light gray, respectively, because the camera is recording
the varying degrees by which individual colors reflect light.
Red and green, which look markedly different in a color image,
appear as a similar shade of gray because they reflect virtually
the same amount of light.
Learning how to evaluate a scene for various tones rather than
color comes with time and practice. Digital cameras with their
LCDs offer an easy way to hone this skill.
The Simple Way
One of the easiest ways to create a monochromatic image is in-camera.
Put the camera in its black-and-white mode, and it automatically
captures a monochromatic image that you can evaluate on the
camera’s LCD. This is an indispensable learning tool that
helps you make the transition from color photography simple.
When the digital camera takes a black-and-white image, it still
utilizes the red, green and blue pixels on its CCD, creating
an image that has three identical grayscale channels. By shooting
with the digital camera’s black-and-white mode, you quickly
get a sense of how individual colors translate to black-and-white.
You’ll also learn how contrasting tones, not merely the
extremes of black and white, can become the key element in a
photograph.
Another quick way to get black-and-white photos is with the
Saturation tool in your image-editing software. Go to Image
> Adjustments > Hue > Saturation, and move the Saturation
slider to the extreme left, eliminating all color data. The
result is a black-and-white image in which the red, green and
blue channels are identical. While easy, it may not provide
the best image possible. Since you might want to emphasize certain
tones, you could use a conversion tool that gives you the ability
to emphasize other color channels for more control.
Doing It In The Computer
As you become more comfortable with evaluating a scene, you
may prefer shooting your images in color and selectively converting
some to black-and-white using your image-processing program.
This gives you the option of creating both color and black-and-white
photos, but it teaches you to assess what images translate better
to monochrome. There are several ways to easily make the change,
as well as advanced techniques that provide greater control.
One of the quickest ways is to convert the RGB image file to
grayscale.
In Photoshop, go to Image > Mode > Grayscale and convert
the open file into a monochromatic image by discarding the color
information. The resulting file is created primarily from the
green channel, with less information from the blue and red channels.
The RGB image is made up of three black-and-white channels—red,
green and blue—and each channel renders the scene differently.
You could see the difference if you shot a scene in black-and-white
through a red, a green and then a blue filter. The red filter
would likely produce a more contrasty scene than the green filter,
while the blue filters lighten expansive elements that are dominantly
blue, such as water and skies. The blue filter also may reveal
electronic noise produced by the CCD.
Using Color Channels
The Channel Mixer (Image > Adjustments > Channel Mixer)
affords great control over the creation of black-and-white photographs.
When the Channel Mixer dialog box is open, click on the Monochrome
option at the bottom of the window; then adjust the red, green
and blue channels to vary the tone and contrast of the image.
Colors close to those of the filter will appear lighter and
thus increase or decrease the contrast between them and other
tones. This can be a significant advantage when you want to
increase the contrast between two colors that appear close in
tone. A red flower against a pattern of green leaves will have
a more dramatic contrast if the red channel is emphasized over
the green, for example. This is because the red flower will
be lightened while the green will darken, thus increasing the
contrast.
The default setting applies 100% to the red channel. However,
you can change this and increase the percentage to the green
or blue channels, taking the strengths of each channel to emphasize
certain tones that are important to your image. If you have
a strong red element in the scene that you want to render as
a dark tone, you would increase the percentage of the green
channel, for instance.
While that seems counterintuitive, remember that if you emphasize
the red channel, the red lightens the scene. The same goes for
green colors if you emphasize the green channel and blue for
the blue channel.
Lastly, make sure that the sum of all three channels doesn’t
exceed 100% if you want to keep the exposure consistent with
the original. Higher numbers will result in a brighter image,
and lower numbers will darken a photograph.
Fine-Tuning Images
The initial conversion of a color image into black-and-white
still may result in an image that’s flat and lacks punch.
It’s important to check black and white points in Levels
and Curves to make adjustments to contrast. Such enhancements
are needed to produce the look you’ve come to expect from
striking monochromatic prints.
Begin with Levels, which includes a histogram that reflects
the entire tonal range of your image. By adjusting the black
and white point indicators, you can establish the darkest and
brightest points of the image. A strong black-and-white image
requires establishing a solid black and solid white point (unless,
of course, your image consists of only gray tones). Adjust both
the black and white point indicators to the extreme edges of
the histogram. If you want a natural-looking image, don’t
bring them in too far; if you do, the image will suffer from
clipping, which results in the loss of the highlight and shadow
details. Even with a slight adjustment, you’ll likely see
an improvement in the overall contrast of the image.
If you want to increase the contrast even further, the best
tool is Curves. The Curves control has a line that runs diagonally
through the graph. By creating a slight S-curve adjustment and
bringing the lower portion down and the higher part up, you’ll
increase the contrast with minimal loss of detail in the highlights
and shadows. The more dramatic the S curve, the stronger the
contrast will appear.
Software Options
There are several software alternatives for achieving superior
black-and-white images, such as nik multimedia’s Color
Efex Pro 2.0 (www.nikmultimedia.com)
and Digital Film Tool’s 55mm digital filter set (www.digitalfilmtools.com),
which provide advanced controls for achieving high-quality monochrome
conversions. With a convenient preview window, the software
shows your adjustments before they’re applied to the final
image.
Unlike Photoshop’s Grayscale conversion, these programs
use advanced algorithms that have a variety of choices over
the adjustments of each color channel, contrast and brightness.
As with the Color Mixer, you can choose to emphasize the red
channel, but the controls are more intuitive and “photographic”—Color
Efex offers three conversion methods and 55mm uses the idea
of color filters for black-and-white conversions in its interface.
Their versatility makes these programs powerful tools, especially
when you want to make a significant number of conversions within
a limited time frame.